Building a Raspberry Pi Desktop
How to make a Surprisingly Decent, Really Cheap Desktop using a Raspberry Pi 4
My old, trusty Linux Desktop did the job for me, except for one serious constraint - the video card only supported one (smallish) monitor. After a too-long quest to determine how to upgrade that card, I was looking at the need to shell out $400-$500 just to feed the pixels in my two shiny new 4K displays. That’s a bit nuts. I’m not gaming - I just want to display lots more text at once.
So, I see that the Raspberry Pi 4 which is also sitting on my desk has two HDMI ports, and I’m wondering…
Bottom line, the two computers have switched roles. I’ve lit up the monitors with a new Pi-based system that comes in at a third the cost of that video card option. The old desktop is now a headless server, available for jobs the Pi can’t do. I rarely fire it up.
All in all it works pretty well, though it is not perfect, and probably not a long-term solution for me. I’ve collected the hardware and steps here needed to do this for yourself, and included some thoughts at the end of the pros and cons of this setup.
Hardware
All told, the cost of setting up this Pi Desktop is less than $150, excluding monitors, keyboard, and mouse. If you’re like me, and already have the Pi, it’s half that cost.
This is the hardware I used.
Raspberry Pi 4 - 8GB - $75
We are asking a lot of the Pi in this project - why not splurge a bit and get the top-of-the-line 8GB model? If you want to save some money, I suspect that there is not much of a performance hit using the 4GB Raspberry Pi 4 - that saves $25. The 2GB model may be a bit sketchy - the GPU RAM for those 4K displays is coming out of that allotment.
Argon ONE Pi 4 Case - $25
I highly recommend the Argon ONE Pi 4 case. It includes thermal and power management (including a power button!) inside a sleek box that makes the system more reliable and very quiet.
Since I built this system, Argon Forty has released the Argon ONE M.2 Case, which includes provisions for including an M.2 SATA SSD in the case. This is worth investigating - my solution has the SSD awkwardly sitting outside the case.
Micro SD Card - $5
At one point you will need to boot from an SD card, in order to set up booting from USB. Once the SSD is up, you won’t need this anymore. I’d keep it around anyway, for use as a recovery image.
ELUTENG USB3 SATA Adapter and SATA SSD ($8 + $30)
USB 3 SATA is significantly faster than the fastest Micro SD cards, and much more reliable. This particular USB3 SATA Adapter is noted to be compatible with the early implementation of Raspberry Pi OS USB boot. Pair that with a generic SSD.
Tasks
Initial Boot
Start by flashing a Raspberry Pi OS image on to the SD card and the SSD. Use the standard image for the SSD. Lite is enough for the SD card.
A word about 64-bit Raspberry Pi OS - I don’t recommend it. The performance is on par with 32-bit, and the Netflix solution laid out below won’t work on it. The only real benefit of 64-bit is the ability for a single process to use more than 4G of RAM. I don’t find that compelling.
USB Boot
Once you’ve booted using the SD card, use these instructions to change the bootloader configuration to support booting directly from USB. I made the following changes:
    BOOT_UART=1
    BOOT_ORDER=0xf14
This makes USB the primary boot device. I’ve found that disk-heavy tasks run in 2/3 time, relative to my high end Micro SD card, after this change. (Note, this may be the default in newer Rapberry Pi OS images)
Once the USB SSD successfully boots, you are done with the SD card.
Power and Thermal Management
The Argon ONE manual has instructions on adding software to control fans and power. Those instructions (spoiler) are to run the following:
sudo curl https://download.argon40.com/argon1.sh | bash
HDMI Support
Raspberry Pi video options are documented at this page. I made the following changes to /boot/config.txt:
    gpu_mem=256
    hdmi_group=2
    hdmi_mode=82
    hdmi_force_hotplug=1
Use Screen Configuration under Preferences to change the layout and resolution of multiple monitors.
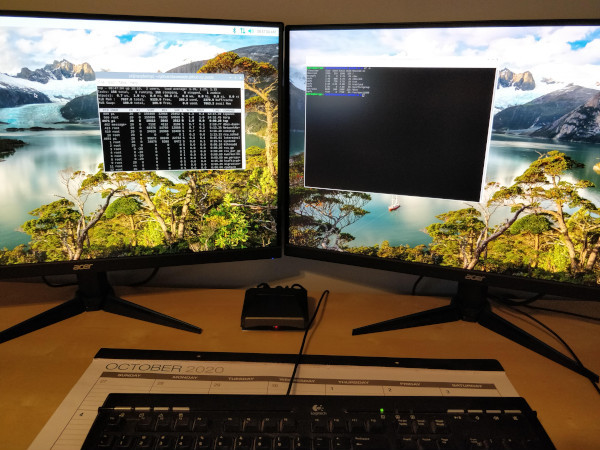
This allows me to set one monitor to 1920 x 1080, and the other to 2560 x 1440. This is not the dual 4K I was originally looking for, but I’ve come to prefer it - I can move windows between monitors to change magnification.
I tried playing with the hdmi_enable_4kp60 parameter, but could not get it to work.
hdmi_drive=2
This forces HDMI mode, and makes “sound through HDMI” work, to play audio through speakers in the monitor. No need for PC speakers - a big win on the total-number-of-wires-needed metric.
disable_overscan=1
One of my monitors showed a black border. This gets rid of it. Don’t set it till you need to.
DRM Video
The Chromium browser in Raspberry Pi OS does not support Netflix et al. out of the box. This site has condensed the workaround into a single script:
    curl -fsSL https://pi.vpetkov.net -o ventz-media-pi
    sh ventz-media-pi
USB Headphone support
Since this was written, Raspberry Pi OS has transitioned from ALSA to PulseAudio. USB headphones now can be expected to work out-of-the-box.
Bluetooth took a bit of work. I used these instructions, which may or may not have made a difference.
One command was absolutely required:
sudo apt-get install pulseaudio-module-bluetooth
I’ve also added this to my startup script:
pactl load-module module-bluetooth-discover
(The original ALSA Text)
The Pi 4 doesn’t have a microphone or A/D. USB headphones are supported, but not by the desktop interface. I used these instructions to create an .asoundrc file that enables USB audio.
Don’t attempt to get Bluetooth audio working - all of my audio outputs become choppy after trying to do this.
Add a Printer
To add printer support:
    sudo apt-get install cups
    sudo usermod -a -G lpadmin pi
Then browse to http://localhost:631/ to administer the CUPS server and add a printer.
So How Well Does it Work?
In short, it works pretty well. For most tasks, it is not that different than the experience on my Linux Desktop.
Chromium supports all of the websites I’d like it to, including mainstream streaming sites.
I didn’t do this project for the ambience, but my office is noticably quieter and cooler since I started relying on the Pi. For most tasks, the fan does not run at all - the aluminum case is an effective heat sink.
Two applications in particular show a notable lag - Chromium and LibreOffice. I can still work with each, but the loading time on Chromium and the menu response lag on LibreOffice is enough to intrude on your conciousness when using those tools.
There are times that I’m constrained by running on a non-x86 processor. It can add a confounding variable to some software development tasks, and there are some challenges to getting some software to run. Notably, Dropbox does not support Arm or the Pi.
There is one persistent bug I see that others may not. My ISP-provided router serves both IPv4 and IPv6 addresses. For some reason, Chromium frequenty switches between them, throwing a “Network Changed” error each time. Disabling IPv6 on the outbound interface fixed that issue. [Edit 04/21 - This was traced to the presence of a second router plugged into the first. Oddly, only Pi’s had heartburn with it] [Edit 06/21 - So it was actually a conflict between dhcdcd and my Comitup-installed NetworkManager, resolved by disabling dhcpcd]
Summary
Bottom line, the Raspberry Pi 4 works acceptably well as a desktop computer driving dual displays.
Chromium is the weakest part of this experience. The current Pi version (78.0.3904/108) is significantly older than the current Debian Stable (83.0.4103-116). I’d love to see more attention paid to this package.
(Edit 12/5/2020 - with the December release of Raspberry Pi OS, Chromium has been upgraded to version 84.0.4147.141. The DRM script still works)
I’m thankful to the Pi for giving me time to sit back and mull what I want out of my next PC. After this experience, I am looking harder at buying a mini-pc for my next desktop.